目标识别
什么是图像轮廓
- 什么是图像轮廓:具有相同颜色或强度的连续点的曲线
- 图像轮廓的作用:可以用于图形分析、物体的识别和检测
注意点
为了检测的准确性,需要先对图像进行二值化或Canny操作
画轮廓时会修改输入的图像,最好将原始图像copy一份,以便于后续分析
查找轮廓
-
查找轮廓API:findContours(img, mode, ApproximationMode...)
- 输入值
img: 源mode: 模式(常用的4种)RETR_EXTERNAL = 0: 只检测外轮廓RETR_LIST = 1: 检测的轮廓不建立等级关系(只要找到轮廓就扔进去)RETR_CCOMP = 2: 每层最多两级RETR_TREE = 3: 按树形存储轮廓
ApproximationMode:CHAIN_APPROX_NONE: 保存所有轮廓上的点CHAIN_APPROX_SIMPLE: 只保存角点
- 返回值
contours: 所有轮廓的列表hierarchy: 层级(查找的轮廓有没有层级关系...)
import cv2 import numpy as np img = cv2.imread('./contours1.jpeg') # 置为灰度 gray = cv2.cvtColor(img, cv2.COLOR_BGR2GRAY) # 二值化 ret, binary = cv2.threshold(gray, 150, 255, cv2.THRESH_BINARY) # 轮廓查找 - 外轮廓 contours, hierarchy = cv2.findContours(binary, cv2.RETR_EXTERNAL, cv2.CHAIN_APPROX_SIMPLE) print(contours) ''' ( array( [ [[ 0, 0]], [[ 0, 435]], [[345, 435]], [[345, 0]] ], dtype=int32), ) ''' # 轮廓查找 - 检测的轮廓不建立等级关系 contours, hierarchy = cv2.findContours(binary, cv2.RETR_LIST, cv2.CHAIN_APPROX_SIMPLE) print(contours) ''' ( array( [ [[ 36, 130]], [[ 37, 129]], [[310, 129]], [[311, 130]], [[311, 400]], [[310, 401]], [[ 37, 401]], [[ 36, 400]] ], dtype=int32 ), array( [ [[ 36, 35]], [[ 37, 34]], [[308, 34]], [[309, 35]], [[309, 39]], [[308, 40]], [[ 37, 40]], [[ 36, 39]] ], dtype=int32 ), array( [ [[ 0, 0]], [[ 0, 435]], [[345, 435]], [[345, 0]] ], dtype=int32 ) ) ''' - 输入值
绘制轮廓
-
API:
drawContours(img, contours, contoursIdx, color, thickness ...)img: 图像源。contours: findContours找到的轮廓返回参数。contoursIdx: 所有的轮廓数据是有顺序的,该参数表示绘制指定轮廓。-1表示绘制所有轮廓。color: 轮廓的颜色。thickness: 轮廓的线宽,-1是全部填充。
import cv2
import numpy as np

img = cv2.imread('./contours1.jpeg')

# 置为灰度
gray = cv2.cvtColor(img, cv2.COLOR_BGR2GRAY)

# 二值化
ret, binary = cv2.threshold(gray, 150, 255, cv2.THRESH_BINARY)

# 轮廓查找 - 外轮廓
contours, hierarchy = cv2.findContours(binary, cv2.RETR_TREE, cv2.CHAIN_APPROX_SIMPLE)

# 绘制轮廓
cv2.drawContours(img, contours, -1, (0, 0, 255), 2)

cv2.imshow('img', img)
cv2.waitKey(0)
轮廓的面积与周长
- 场景:比如我们检测到很多碎小的轮廓,这些轮廓可能不是我们计算的范围之内,我们需要过滤掉它,这个时候我们就可以使用面积来进行过滤,小于多少就可以跳过。
- 轮廓面积的API:
contourArea(contour)contour: 轮廓
- 轮廓周长的API:
arcLength(curve, closed)curve: 曲线(轮廓)closed: 轮廓是否闭合,闭合为true 非闭合为false
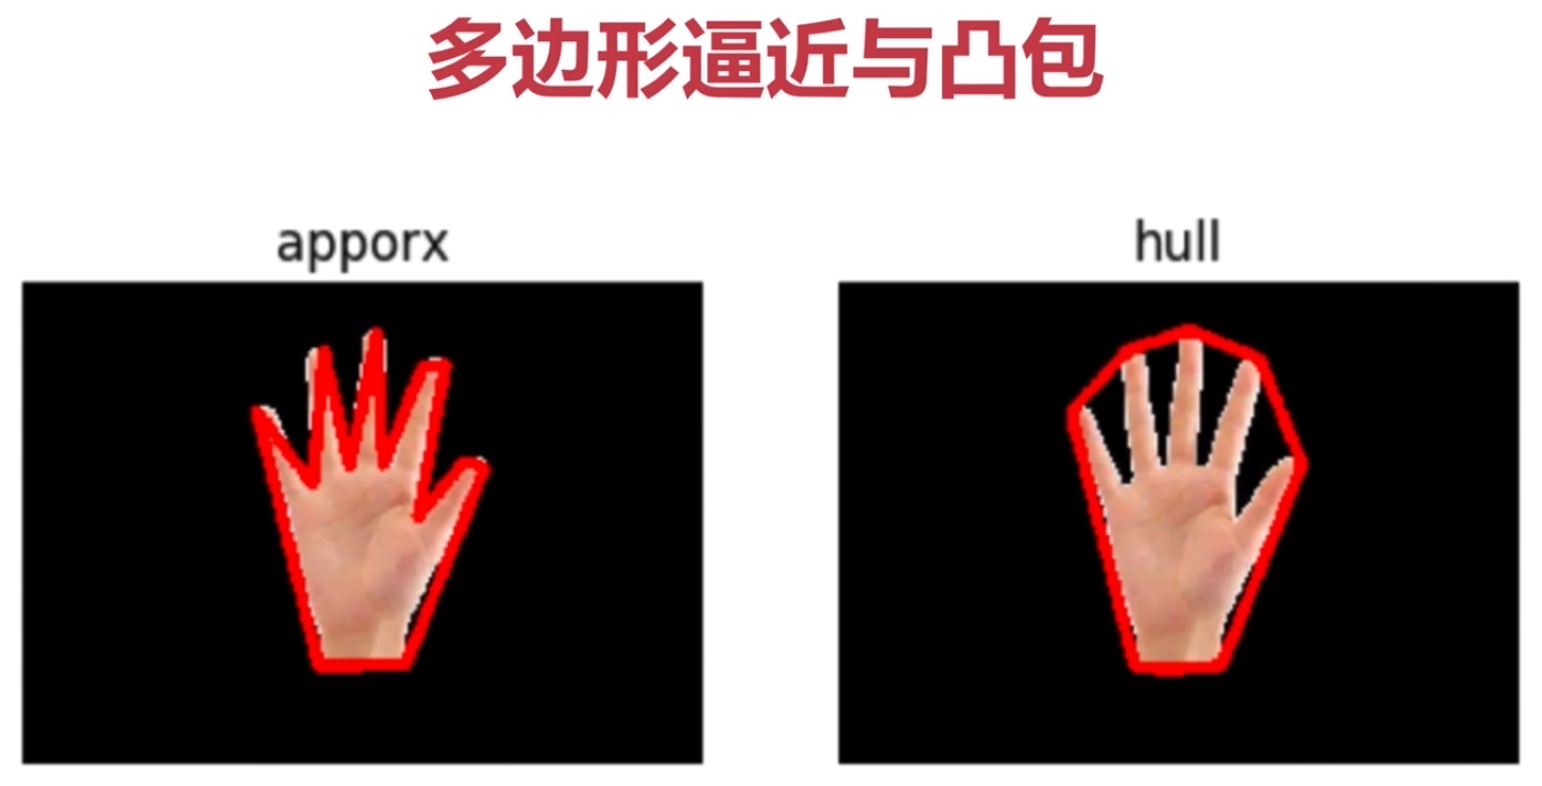
多边形逼近与凸包
-
区别
- 多边形逼近:节省计算与存储,只保留特征点
- 凸包:只保留轮廓,支持有些时候我们只需要有轮廓的场景
-
多边形逼近API:
approxPolyDP(curve, epsilon, closed)curve: 曲线(轮廓)epsilon: 精度closed: 是否是闭合的import cv2 import numpy as np # 画出以点的线条 def drawShape(src, points): i = 0 while i < len(points): if(i == len(points) - 1): x,y = points[i][0] x1,y1 = points[0][0] cv2.line(src, (x, y), (x1, y1), (0, 0, 255), 3) else: x,y = points[i][0] x1,y1 = points[i+1][0] cv2.line(src, (x, y), (x1, y1), (0, 0, 255), 3) i = i + 1 img = cv2.imread('./hand.png') # 置为灰度 gray = cv2.cvtColor(img, cv2.COLOR_BGR2GRAY) # 二值化 ret, binary = cv2.threshold(gray, 150, 255, cv2.THRESH_BINARY) # 轮廓查找 - 外轮廓 contours, hierarchy = cv2.findContours(binary, cv2.RETR_TREE, cv2.CHAIN_APPROX_SIMPLE) # 多边形逼近 approx = cv2.approxPolyDP(contours[0], 20, True) # 绘制轮廓 drawShape(img, approx) cv2.imshow('img', img) cv2.waitKey(0)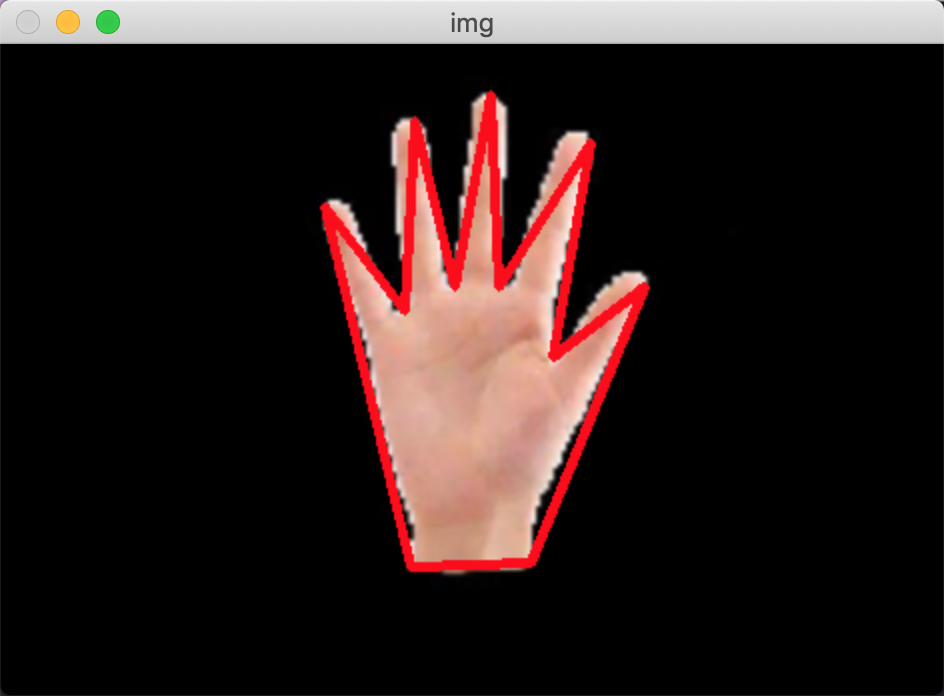
-
凸包API:
convexHull(points, clockwise)points: 点(轮廓)clockwise: 绘制方向顺时针还是逆时针import cv2 import numpy as np # 画出以点的线条 def drawShape(src, points): i = 0 while i < len(points): if(i == len(points) - 1): x,y = points[i][0] x1,y1 = points[0][0] cv2.line(src, (x, y), (x1, y1), (0, 0, 255), 3) else: x,y = points[i][0] x1,y1 = points[i+1][0] cv2.line(src, (x, y), (x1, y1), (0, 0, 255), 3) i = i + 1 img = cv2.imread('./hand.png') # 置为灰度 gray = cv2.cvtColor(img, cv2.COLOR_BGR2GRAY) # 二值化 ret, binary = cv2.threshold(gray, 150, 255, cv2.THRESH_BINARY) # 轮廓查找 - 外轮廓 contours, hierarchy = cv2.findContours(binary, cv2.RETR_TREE, cv2.CHAIN_APPROX_SIMPLE) # 凸包 hull = cv2.convexHull(contours[0]) # 绘制 drawShape(img, hull) cv2.imshow('img', img) cv2.waitKey(0)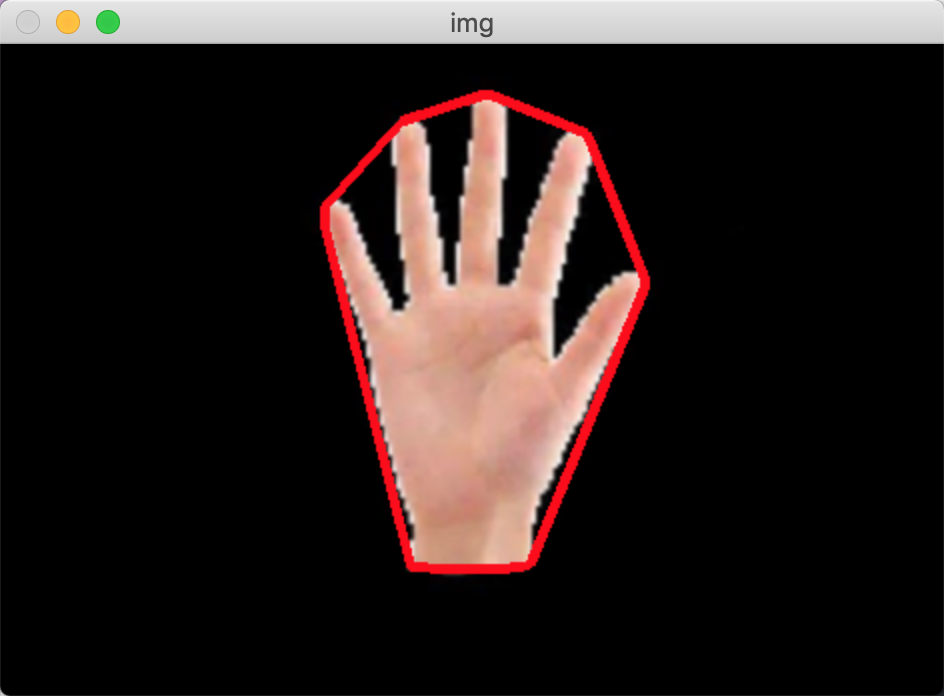
外接矩阵
- 最小外接矩阵与最大外接矩阵的区别

- 最小外接矩阵:我们需要知道一个物体有没有旋转,并且知道旋转角度,就可以使用最小外接矩形。
- 最小外接矩阵API:
minAreaRect(points)points: 物体的坐标点(轮廓)- 返回值
RotateRect:- x, y 起始点
- width, height 宽和高
- angle 角度
-
最大外接矩阵API:
boundingRect(array)array: 轮廓- 返回
Rect
import cv2

img = cv2.imread('./hello.jpeg')

# 置为灰度
gray = cv2.cvtColor(img, cv2.COLOR_BGR2GRAY)

# 二值化
ret, binary = cv2.threshold(gray, 150, 255, cv2.THRESH_BINARY)

# 轮廓查找 - 外轮廓
contours, hierarchy = cv2.findContours(binary, cv2.RETR_TREE, cv2.CHAIN_APPROX_SIMPLE)

r = cv2.minAreaRect(contours[1])
# 只获取坐标
box = cv2.boxPoints(r)
# 类型转换
box = np.int0(box)
cv2.drawContours(img, [box], 0, (0,0, 255), 2)

x,y,w,h = cv2.boundingRect(contours[1])
cv2.rectangle(img, (x, y), (x+w,y+h), (255,0,0), 2)

cv2.imshow('img', img)
# cv2.imshow('bin', binary)
cv2.waitKey(0)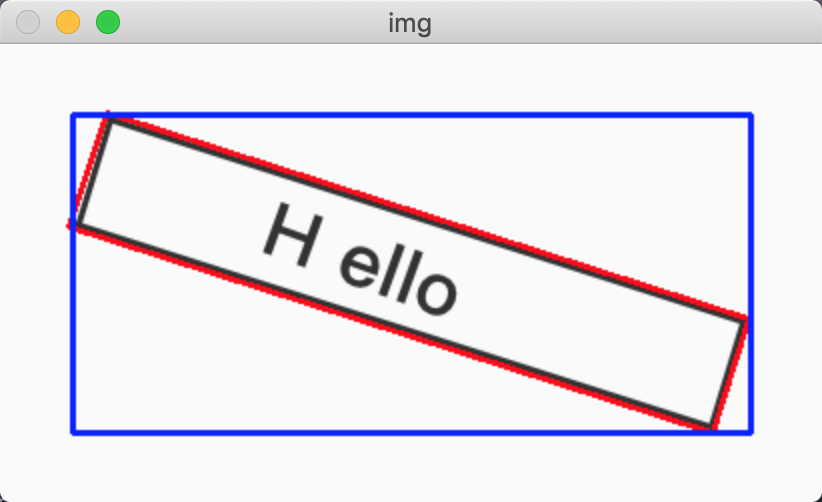
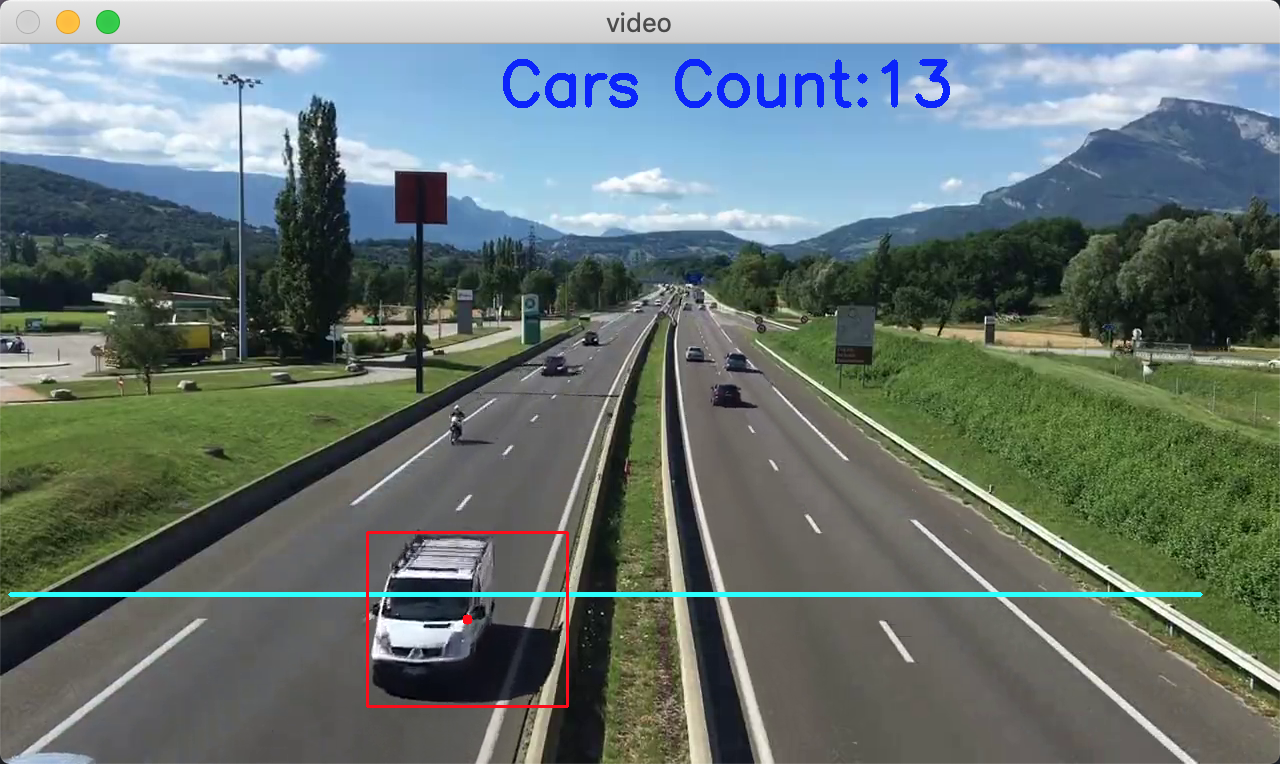
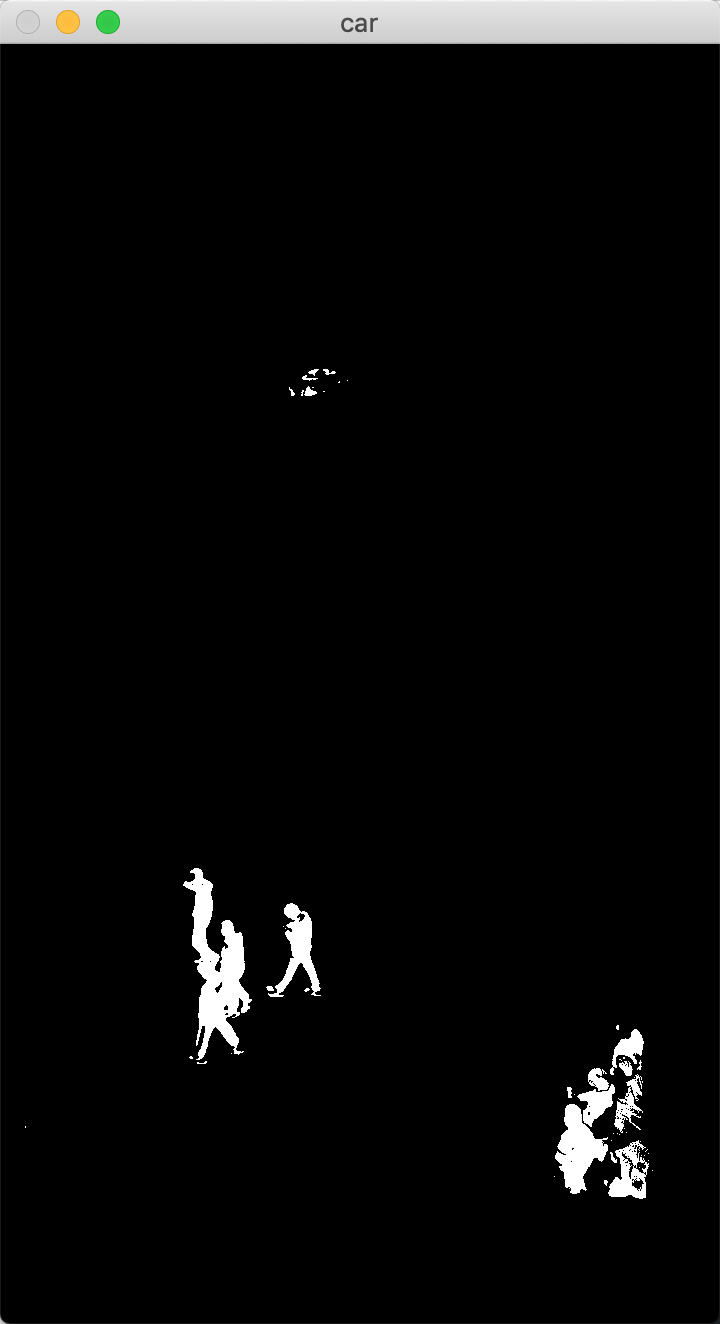
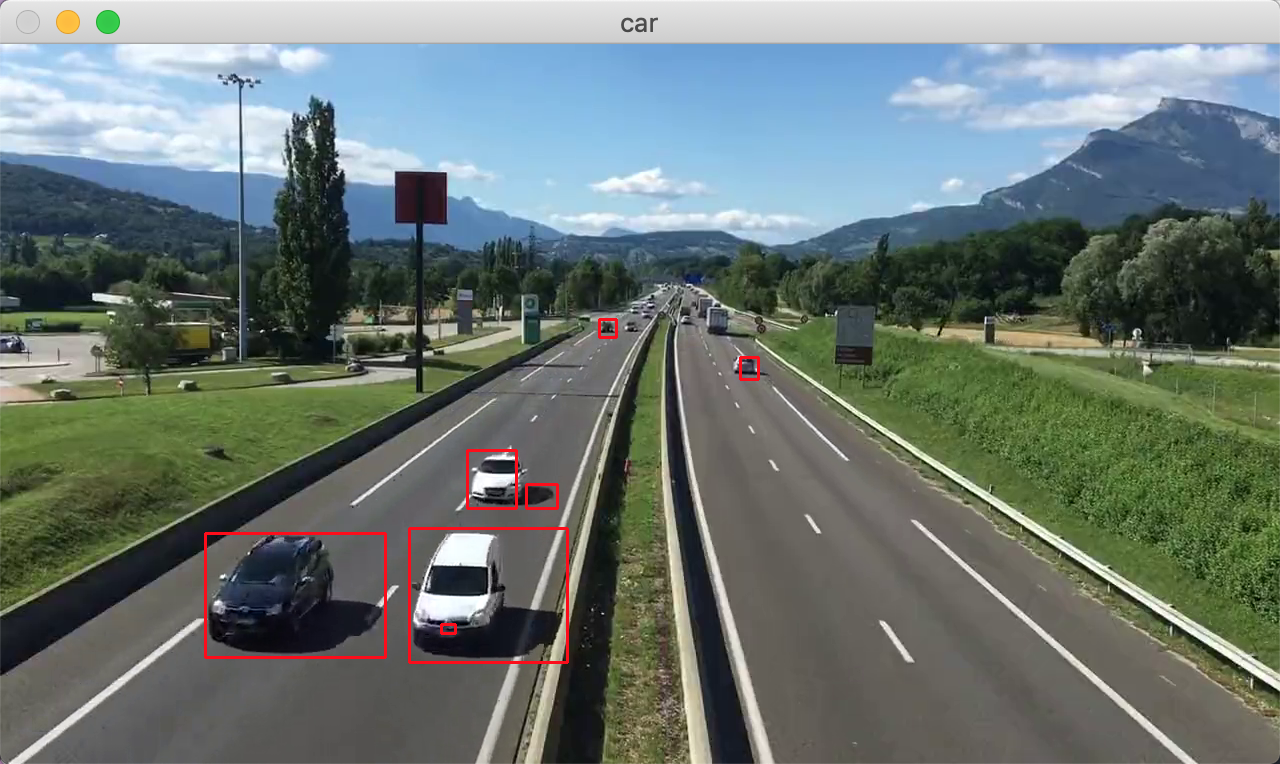
车辆统计 - 总览
- 涉及到的知识点
- 基本图像运算与处理
- 形态学
- 轮廓查找
- 加载视频
- 通过形态学识别车辆
- 对车辆进行统计
- 显示车辆统计信息
车辆统计 - 视频加载
车辆统计 - 去背景
- API:
createBackgroundSubtractorMOG
车辆统计 - 形态学处理
车辆统计 - 逻辑处理与显示信息